Alterations and Confidence
I borrowed Rosslyn's sewing machine for the weekend, intending on buckling down and making a dent into my fabric stash and churning out some nice new pieces. However, my brain was eaten along the last day or two by this blog: Elegant Musings. I love vintage clothing, specifically from the forties and fifties and she makes them so lovely! And then I came across this tutorial. Ideas for new clothes flew out of my head. I have few clothes left from my purge at the beginning of the year, but there are a couple items that could use some work...
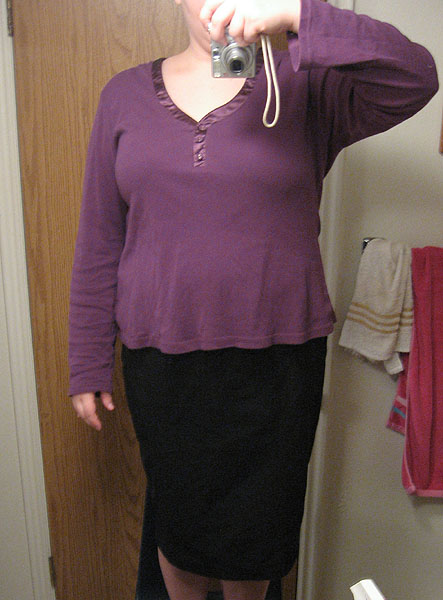
My mom gave me this purple sweater about half a year ago and it didn't fit her and it didn't even really fit me, as you can see. It was a bit of a tent, the sleeves were too long, and whenever I wore it I spent the whole day adjusting the collar to keep it from showing my underthings and/or too much cleavage. Don't get me wrong; I like my bust line. But I don't need to be showing it in such detail to everyone else! The pencil skirt I purchased with Rosslyn in January from Torrid (one of my favorite stores for curvy and busty women). It fit perfectly then, however, it was now so loose in the waist that it bunched up and looked generally awful just in that spot. So I began to formulate a plan...
Here is the outfit in question. You can see how shapeless and loose the pieces are, and how much fatter they make me look. I'm plump, but I'm losing weight. You couldn't tell if I wore this.
Out came the sewing machine, the chalk, and the pins. I started with the skirt and wore it inside out. I carefully pinched it in on either side and marked how much, then took it off and drew a smoother line (which actually wasn't smooth enough. I had to re-stitch it in further down past where I have the chalk marks in the pic to create a smooth line through the hip and top of the thigh). I then pinned the line. As it turns out, I needed to lop off four inches total at the waist and hip. Wow. If that doesn't bolster my weight loss goals!
The sweater was the trickier one to do. I did the same thing with this one, marking how much I wanted off of it. Turns out I was taking eight inches total of width out of the body and the sleeves. I also opted to shorten the sleeves to elbow length, as that is much more flattering line on me. I also pinned up the collar, taking an inch out of each shoulder so I wouldn't have to worry about my underthings showing anymore. I did not change the neckline's overall shape, nor did I shorten the length of the body. I liked both of those.
The next step was the long and tedious part. I used a simple backstitch on the machine to get my lines in, then tried the pieces on after. I then made adjustments (the sweater was fine, but the skirt bunched in the hip funny, so I smoothed that line out and further in). After that I used a zigzag stitch to seal the seams and cut off the excess fabric. Hemming the sleeves on the shirt was the hardest part, as the machine kept trying to eat one of the sleeves. It did not like the knit fabric at all. I think I jammed it three times in the same spot on the same sleeve. I was about ready to scream at that point, as I was running out of time to finish before I had work. After work I'd have no easy daylight to see with. However, in the end I did finish before I had to leave, but I had to wait until after work to take pics of the result.
Check it out! I suddenly have more of a figure! I wish I had better pics to show this to you, but no one was home and the lighting was bad, so Myspace photos it is. Sorry. But I am so proud of myself! I'd never done anything like this before and it was exhilarating. I can tailor things to myself! Without another person! Sweeeet.


Comments